www.trooper4x4.pl
Forum miłośników samochodów ISUZU 4x4 oraz OPEL 4x4
http://trooper4x4.pl/forum/
renowacja troopra 1994 3.1 td
Strona 10 z 10
Re: renowacja troopra 1994 3.1 td
chłopak zakochany nie ma czasu
Re: renowacja troopra 1994 3.1 td
Forum zmienił dziamdziak jeden  Ale przyznaje ze prezentuje sie teraz lepiej jak w fabryki
Re: renowacja troopra 1994 3.1 td
Ta... 
No ale mógł by się objawić, żeby gula nam wyhuśtać.
No ale mógł by się objawić, żeby gula nam wyhuśtać.
Re: renowacja troopra 1994 3.1 td
co do spawów to jeszcze kolego musisz sie w tym podszkolic;p
Re: renowacja troopra 1994 3.1 td
Ta...
A czym, jaką technologią, Ty spawałeś swoją ramę?
wodnicki112 napisał(a):co do spawów to jeszcze kolego musisz sie w tym podszkolic;p
A czym, jaką technologią, Ty spawałeś swoją ramę?
Re: renowacja troopra 1994 3.1 td
Witam
Że się wtrące bardzo ładna i inspirująca praca nad tym trooperem, mam plan zrobic to samo z moim z tym że posiadam bardzo mocny sprzęt do piaskowania, profesionalną spawarkę, i nie wydam na spawanie i piaskowanie ani grosza no chyba że za prąd.
Moje pytanko, kolega BUNNY malował rame farbą ocynkową ja chce ramę zawieźc do ocynku koszt około 400 zł jest taka opcja z tym że nie mam pojęcia czy rama w trooperze 90r, nie ma zamkniętych profili?
Re: renowacja troopra 1994 3.1 td
hej.
Taka cisza więc może ja coś wtrące.
Pomysł z ocynkiem bardzo dobry (sam tak zrobiłem i jestem mega zadowolony)
a na drugie pytanie odpowiem pytaniem.
jak rama może nie mieć profili zamkniętych ?
polecam Ci również po ocynku malowanie proszkowe , oczywiście jeśli masz taką możliwość.
Tu masz linka jak mi wyszło:
viewtopic.php?f=34&t=3496
koncowego efektu nie zobaczysz ponieważ plany się nieco zmieniły i montek chyba nie zobaczy terenu.
poprostu szkoda mi takiego samochodu
Re: renowacja troopra 1994 3.1 td
rayan, z jakiego województwa jesteś?
Re: renowacja troopra 1994 3.1 td
marcinoski napisał(a):...
jak rama może nie mieć profili zamkniętych ?
Wystarczy ze jest z ceownika
Re: renowacja troopra 1994 3.1 td
Nie ukrywam, ze byłem ciekaw efektów końcowych projektu (chyba najbardziej rozległa renowacja Troopera opisana na forum), znalazem wpisy autora tematu na brytyjskim forum. Nie wiem jakie ma zdanie na temat opublikowania ich tutaj, ale jako ze nie ma z nim kontaktu, a tresci dostepne sa publicznie w internecie pozwoliłem sobie wkleić
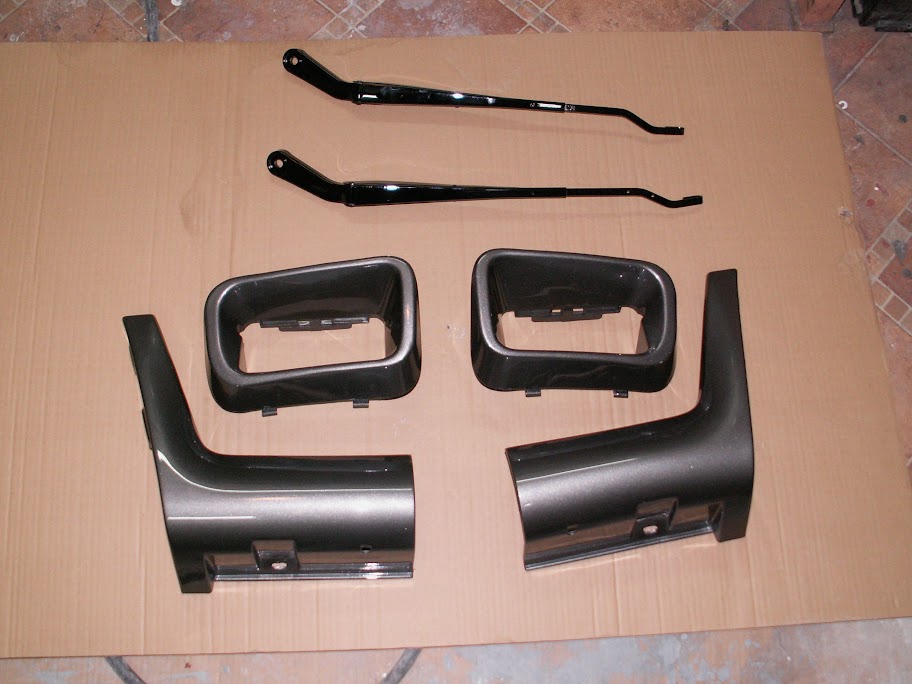
BUNNY_PL napisał(a):But good news - bumpers and all kind of plastics are finally finished !.
Original wiper arm is painted with some ridiculous spray paint - or whatever it is. I have sanded it down , primed with epoxy primer and than it was painted with black base + clear coat. Now it won't peel off ! and looks great in sunlight
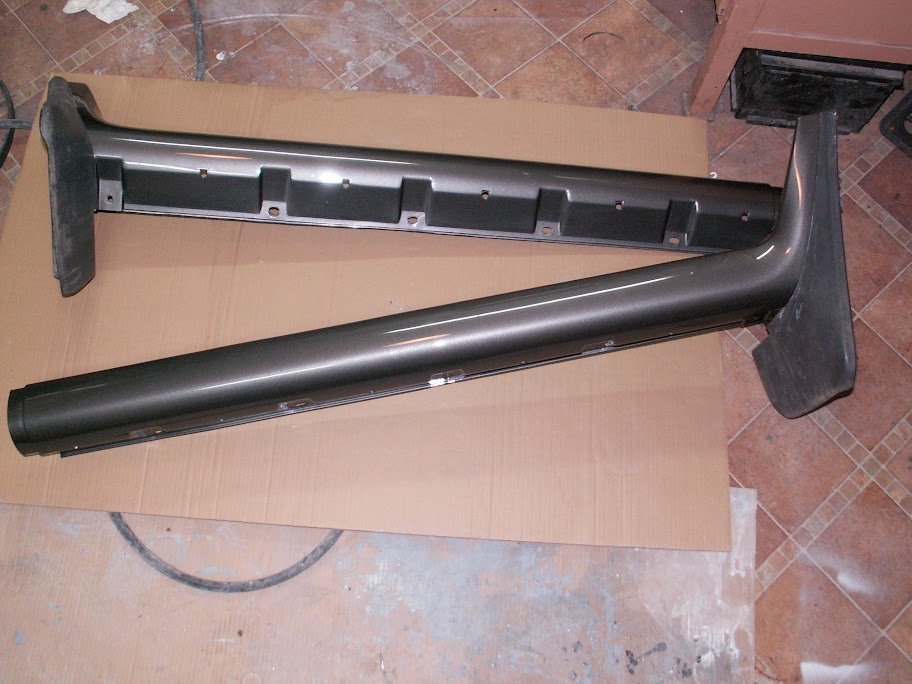
Working on bumpers was a real pain for me. Front bumper was broken and welded, then a lot of body filler was applied. Photos are not showing real life result. I will take car out and take photos .. soon.
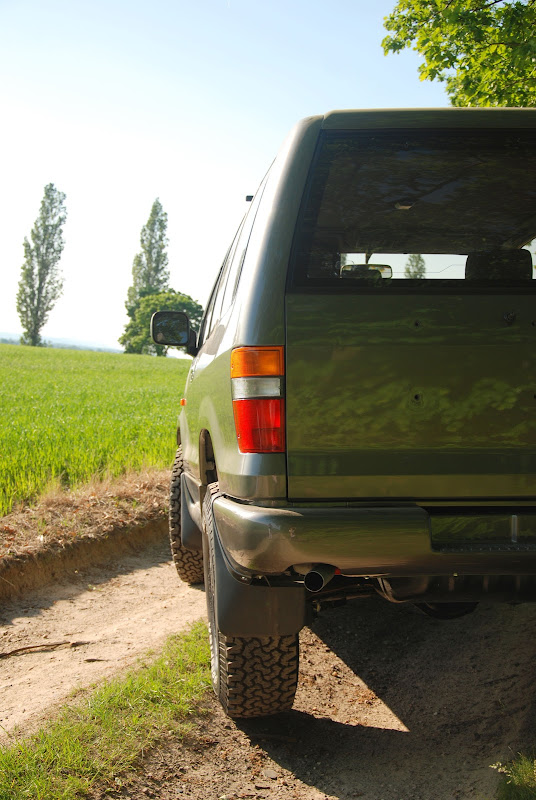
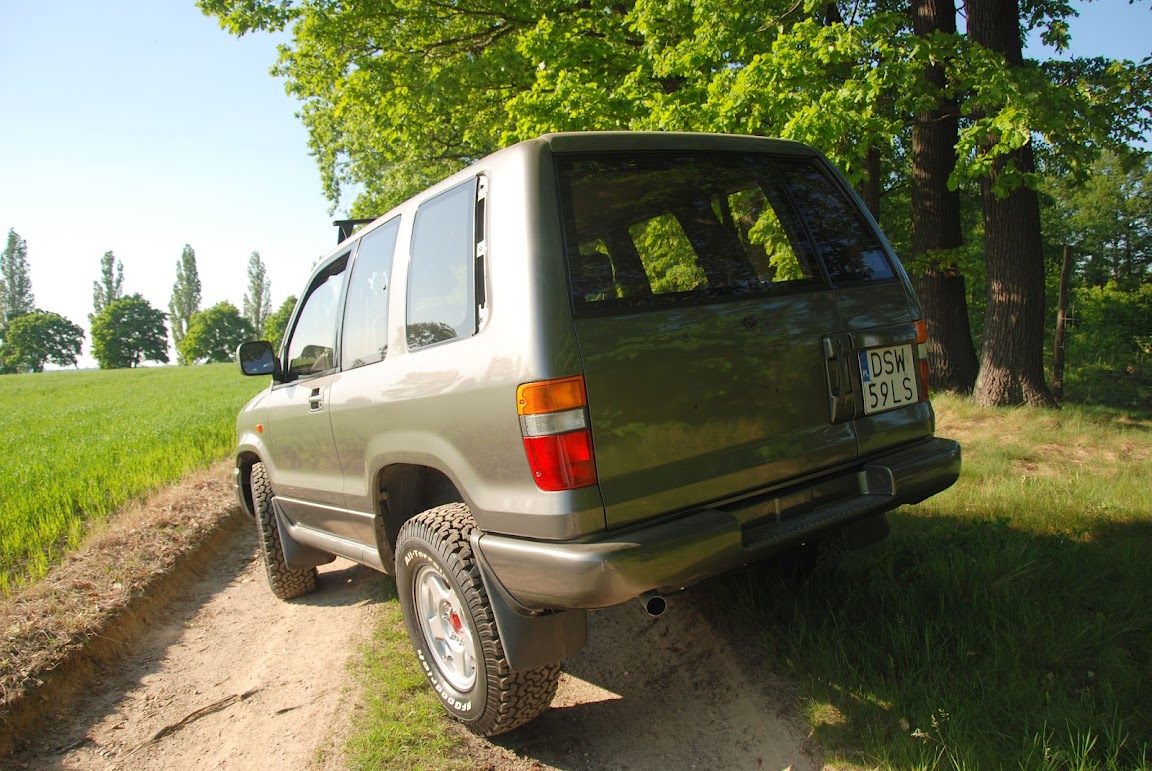
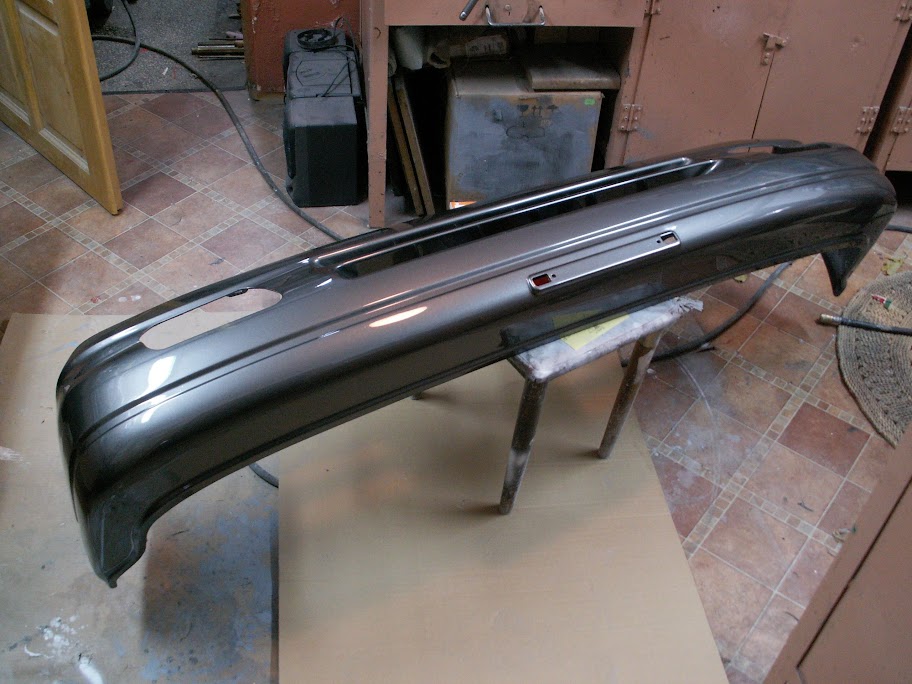
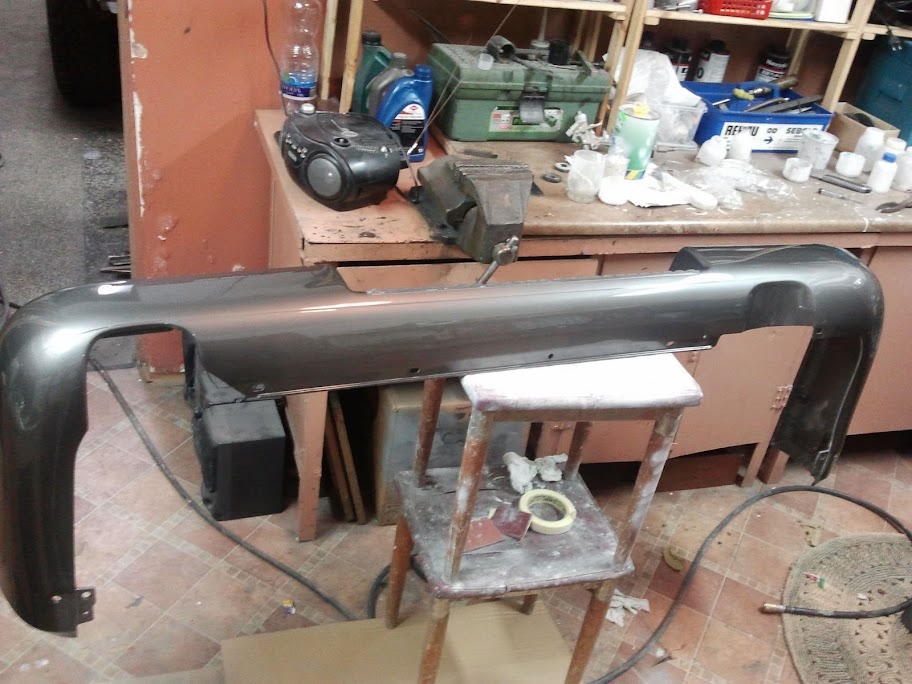
As You can see here i have changed my rear bumper. There will be no bumper lights any more and blanking holes was more expensive than used bumper... I bought some used from import versions and repainted it ..
As You can see its close to some final result. I have to put bumpers on, finish this &^$% rear lights and put interior back inside. I will have to do something with scratched interior panels. I still don't know how to do itbut i will figure something out
.


Re: renowacja troopra 1994 3.1 td
BUNNY_PL napisał(a):I don't even know where to start
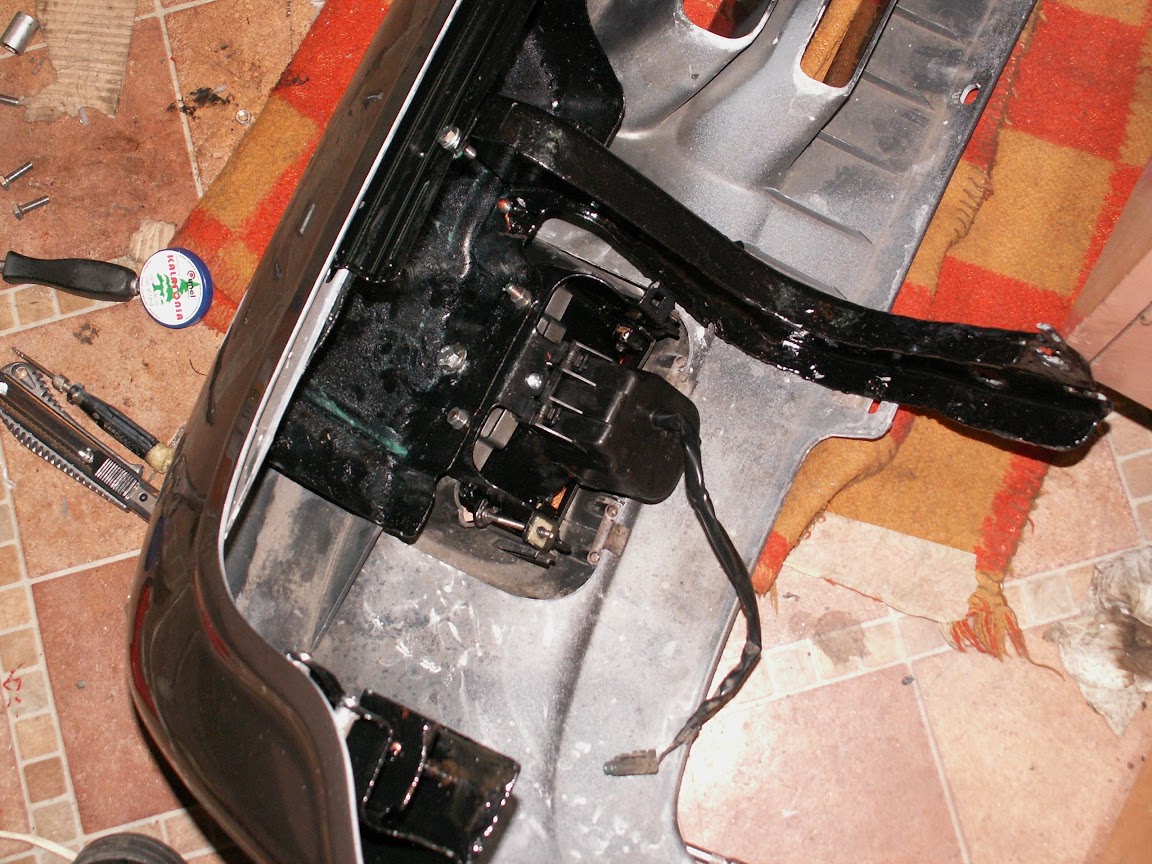
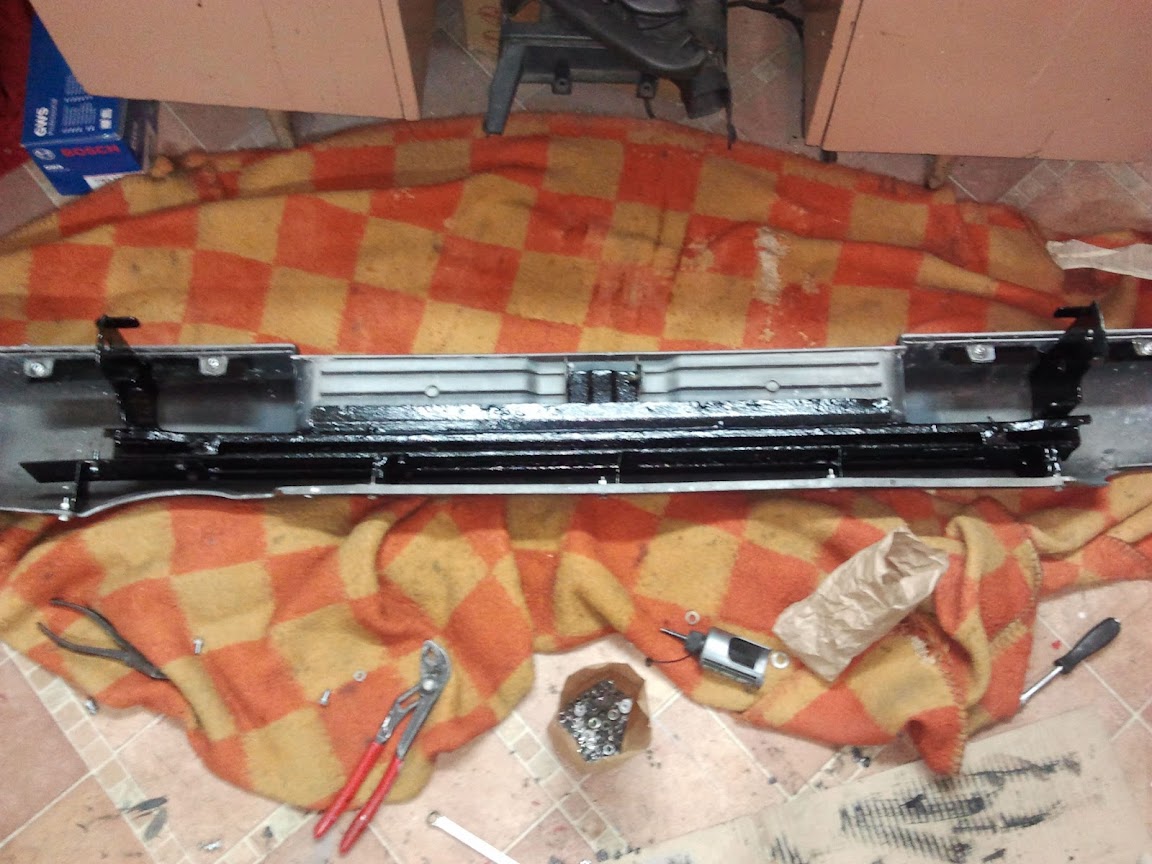
Lets finish bumpers maybe.
All metal bumper mounting parts were sandblasted.
Everything is covered in anti rust wax
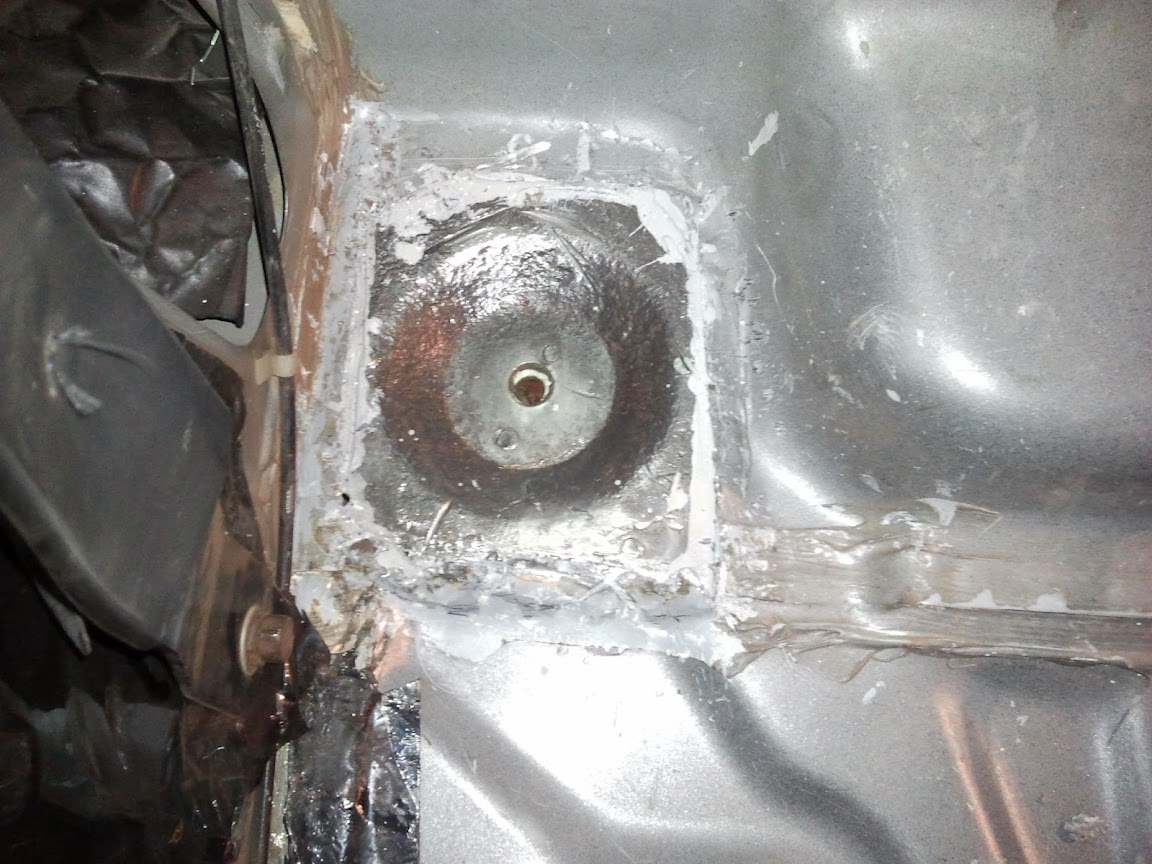
I sealed all holes around fog-lights to prevent moisture and in result - rust.
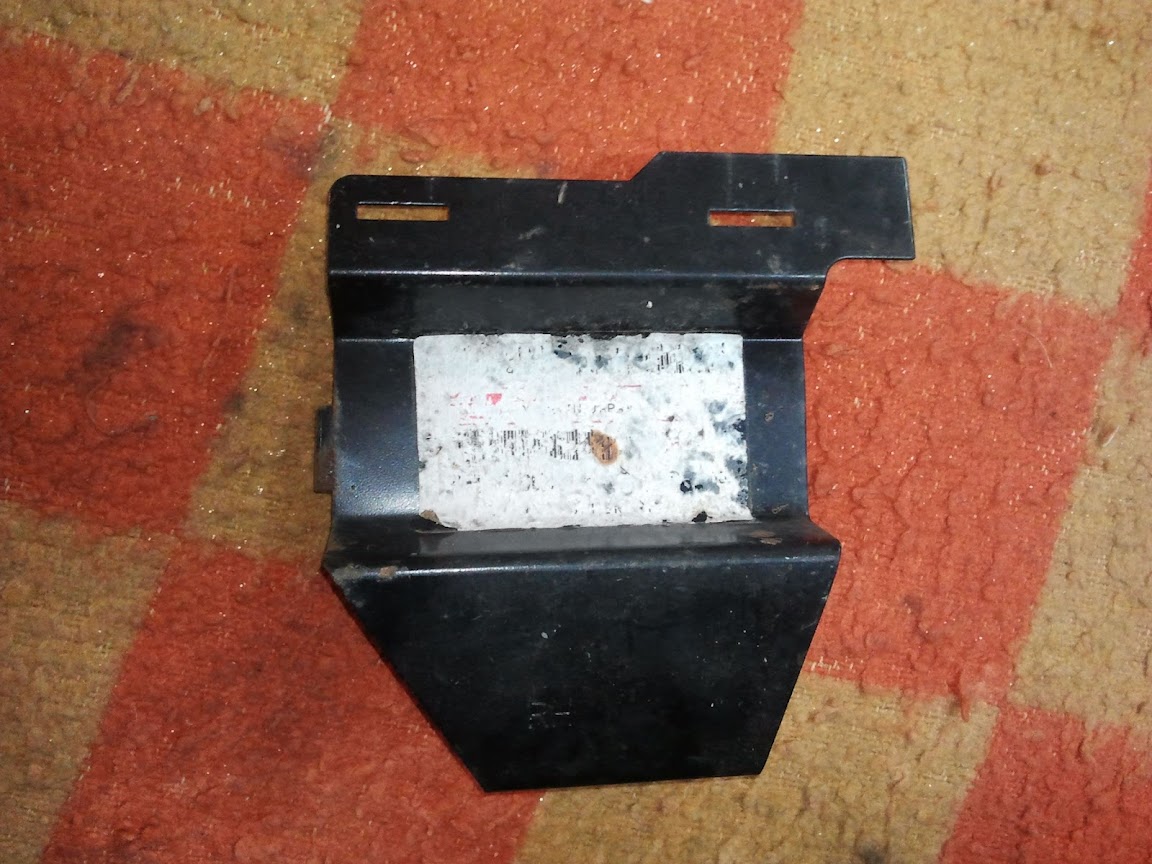
I was very lucky to find this brand new rear bumper mountsfor silly money. Its also sealed as it should be !
--------------------------
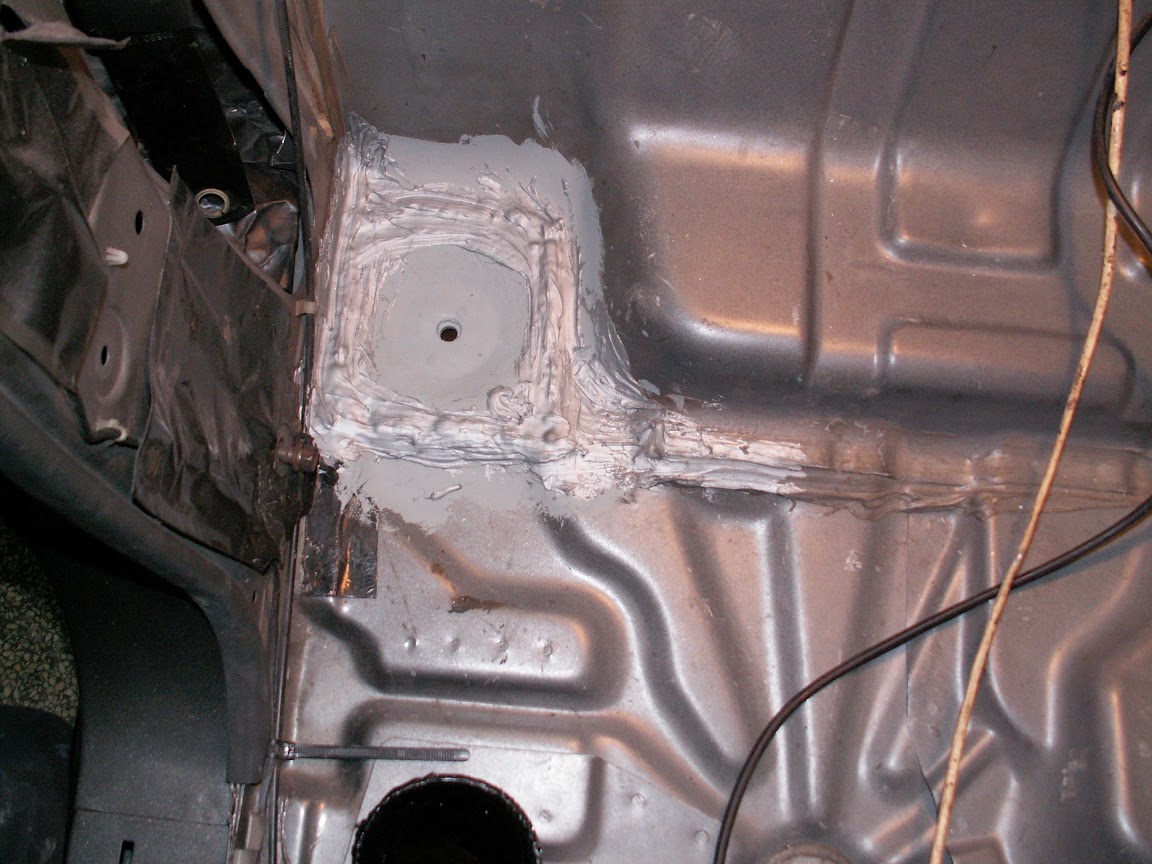
Now lets move inside. I knew that something was wrong with this floor part almost 2 years ago when i removed all interior. Guess what, i was right
-----------
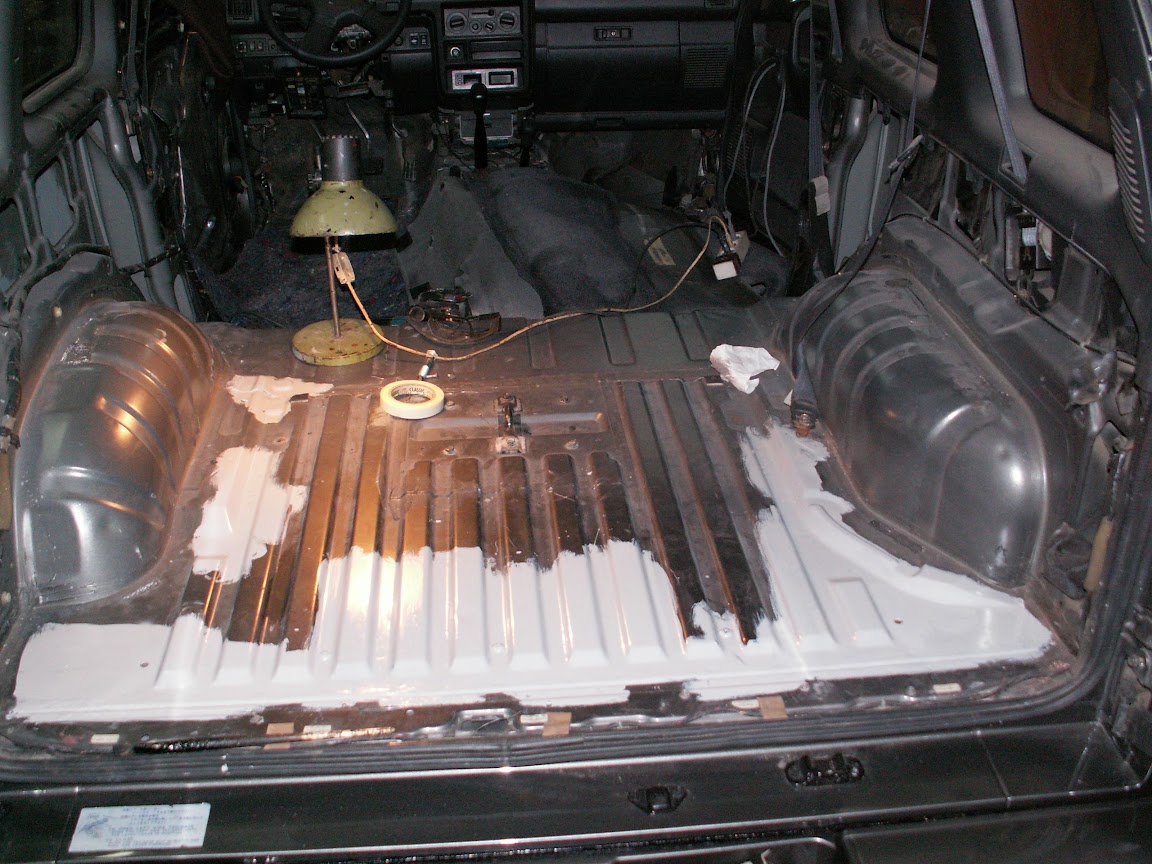
Then i moved more to the rear of the car
Then i ripped out all old stinking floor mats and replaced it with new foam type ones.
old one
new one.
----------------
Then it was time for rims refurbishing. After painting it looks like new.
and my old wheel nuts covered with new chrome
-----------
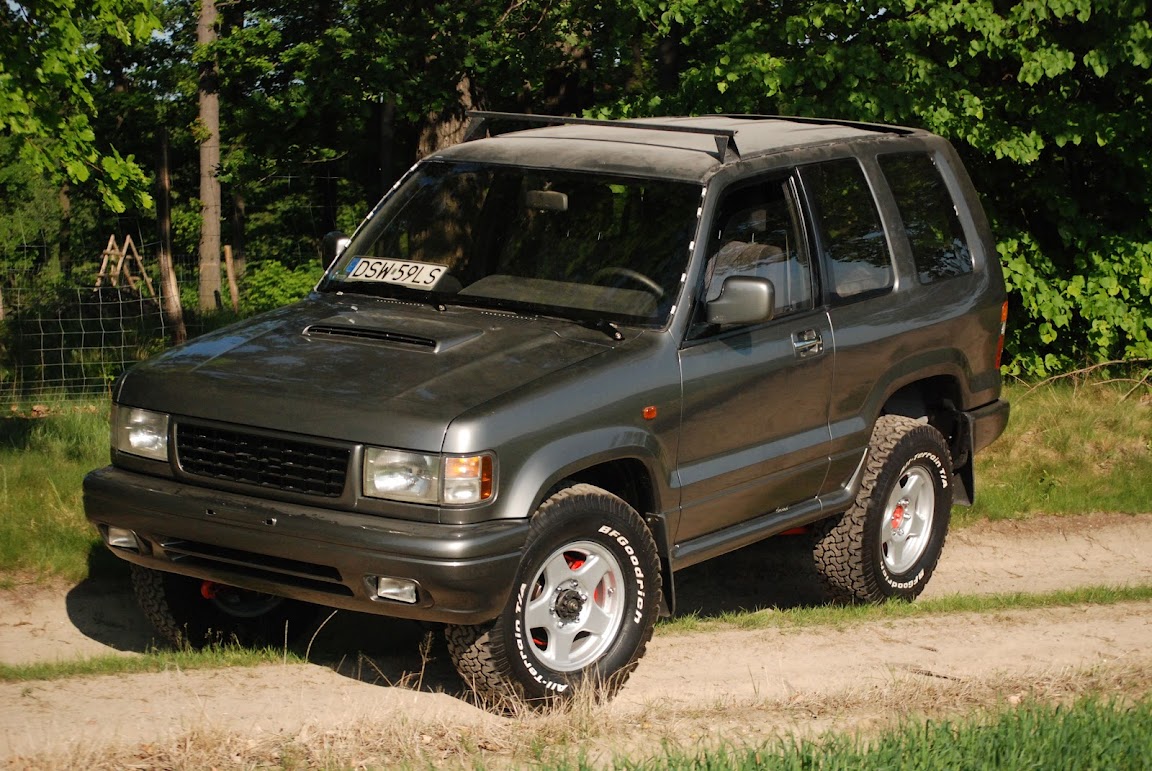
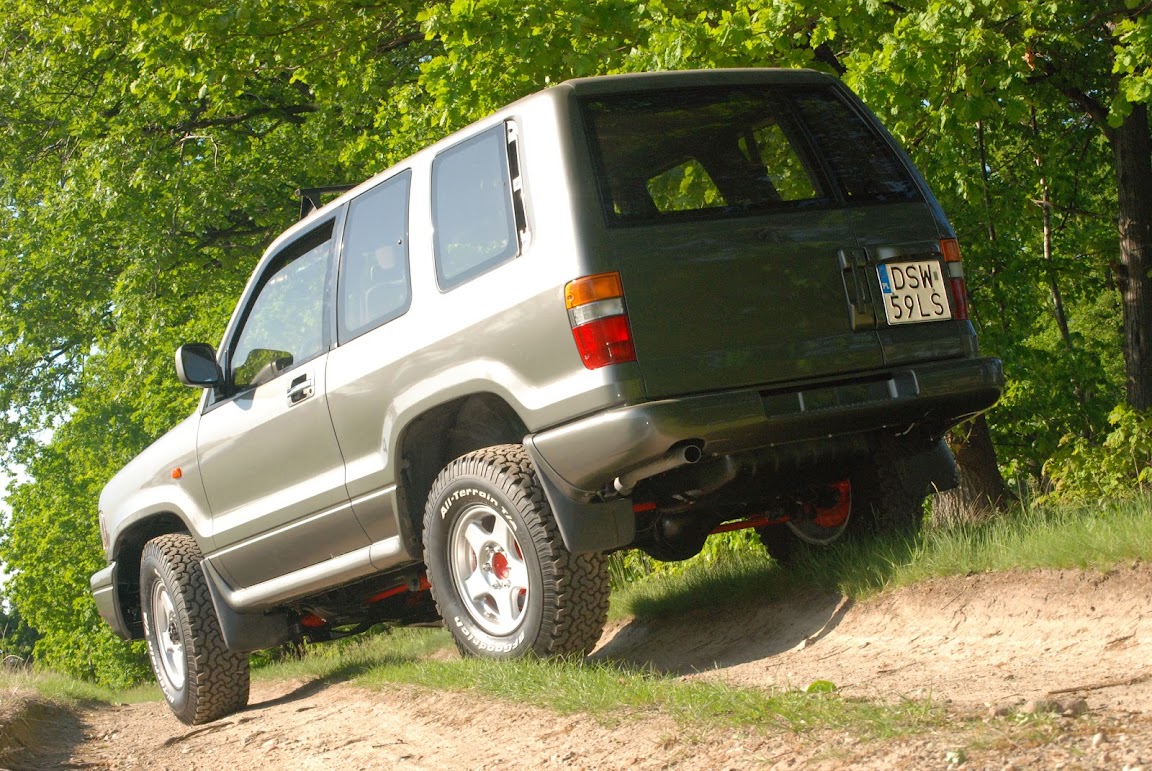
I promised myself that i will take photos after everything will be finished but for now i will show You how it looks right now. On the roof You can find dust collected for 2 years
Now im trying to finish interior and some small bits around the car. I think im very close to the end